Most homeowners don’t lose money on a hail claim because of the storm itself. They lose it because they didn’t document it properly. That’s the hard truth and it’s exactly why understanding how to document hail damage for an insurance claim can be the difference between a full payout and a frustrating denial. I’ve seen it play out more times than you’d expect. Two homes. Same street. Same storm. Same size hail. One homeowner walks away with a full roof replacement. The other gets a partial repair or worse, a denial letter. The difference? Clean, structured, undeniable documentation.
If you’re a homeowner in Tyler, Texas, this matters even more. Hailstorms are common here, and insurance carriers know it. That means higher claim volume, stricter inspections, and less tolerance for weak evidence. This guide is designed for that exact moment after the storm before you hire anyone, before you file your claim, and before someone else starts shaping your story. Because once the claim process begins, your documentation becomes your voice. And if that voice isn’t clear, consistent, and backed by evidence, it gets ignored. Let’s fix that.
What Counts as Hail Damage (And What Insurance Companies Look For)
Hail damage isn’t always obvious. In fact, the most expensive damage often looks subtle at first.
Here’s what typically qualifies:
- Roof (asphalt shingles): bruising, soft spots, granule loss
- Metal components: dents on flashing, vents, gutters
- Siding: chips, cracks, or punctures
- Windows/screens: visible fractures or holes
- HVAC systems: bent fins or impact dents
Now here’s where things get technical. Insurance companies separate damage into:
- Functional damage – impacts performance or lifespan
- Cosmetic damage – affects appearance only
Functional damage gets paid. Cosmetic damage often doesn’t. Your job when learning how to document hail damage for an insurance claim is to prove that the damage impacts performance not just looks.
Why Proper Documentation Is Critical for Your Claim
Insurance companies don’t pay based on assumptions. They pay based on proof. Weak documentation creates doubt. And doubt leads to reduced payouts or denials.
Here’s how documentation quality affects outcomes:
| Documentation Quality | Likely Outcome |
| Detailed, timestamped, organized | Full payout |
| Partial or inconsistent | Underpayment |
| Minimal or unclear | Denial |
In storm-heavy areas like Tyler, adjusters see hundreds of claims. If yours isn’t clearly documented, it won’t stand out and that’s a problem.
Step-by-Step How to Document Hail Damage for an Insurance Claim
This is the backbone of your claim. Follow these steps carefully.
Step 1: Ensure Safety Before Inspecting
Start here. If your roof is steep, wet, or unstable stay off it. Document from the ground using zoom or binoculars. Safety is non-negotiable.
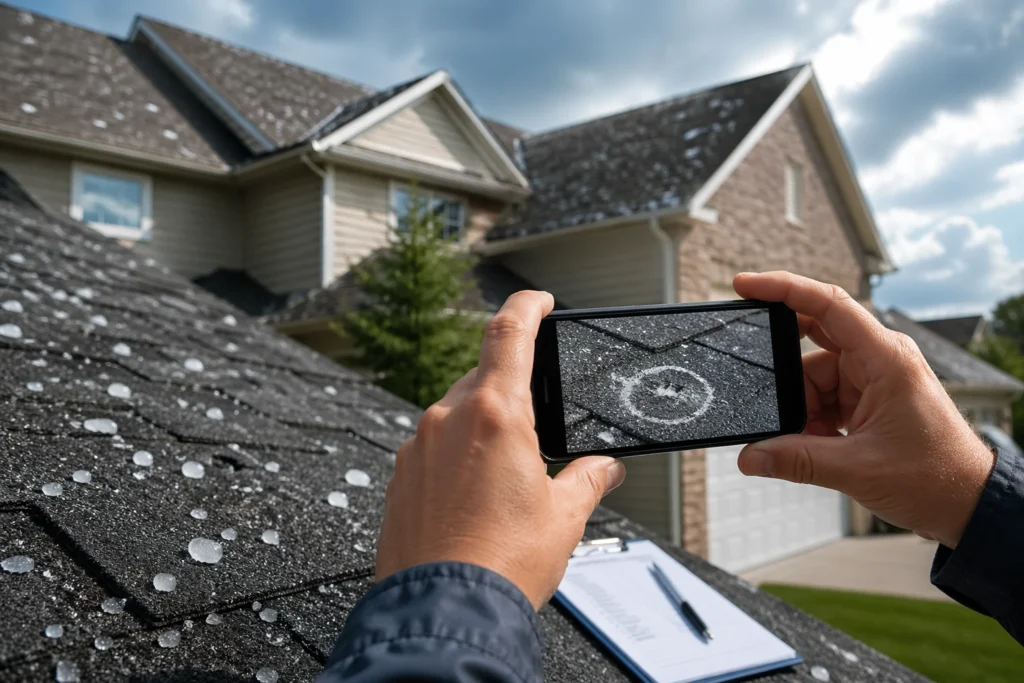
Step 2: Take Wide-Angle Photos First
Before zooming in, zoom out.
Capture:
- Full exterior of your home
- Roof overview
- Detached structures
Wide shots provide context and establish baseline condition.
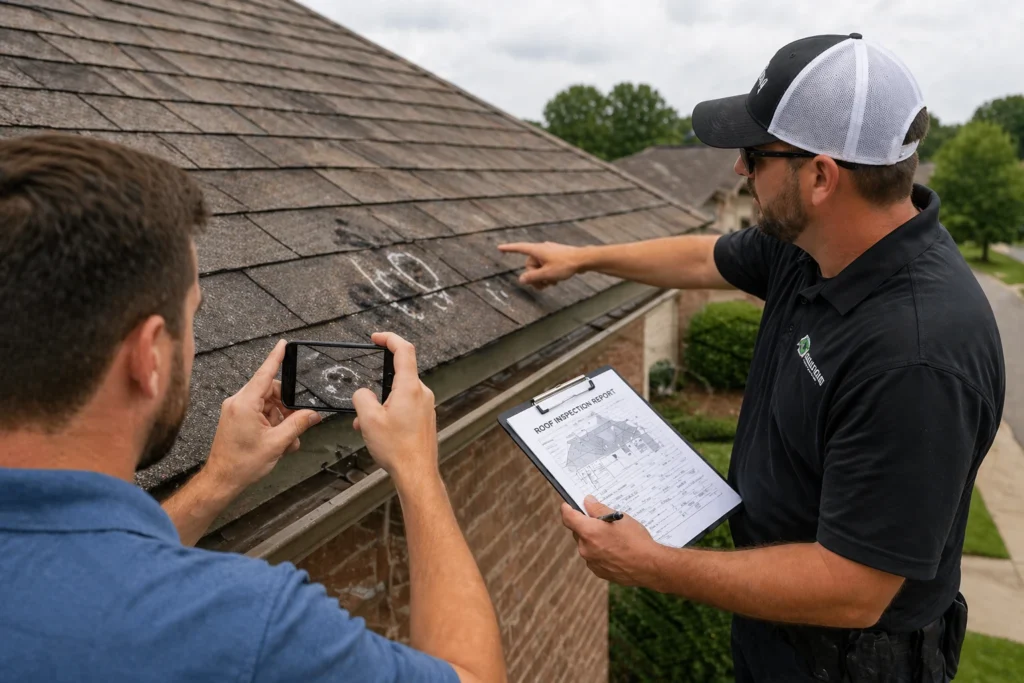
Step 3: Capture Close-Up Damage Evidence
Now get precise.
Focus on:
- Shingle bruising
- Granule loss
- Metal dents
- Cracks in siding
Use chalk to circle damage lightly. Take multiple angles.
Step 4: Document Date, Time, and Storm Details
Photos without a timeline are weak evidence.
Record:
- Storm date and time
- Hail size
- Duration
You can support this with reports from the National Weather Service.
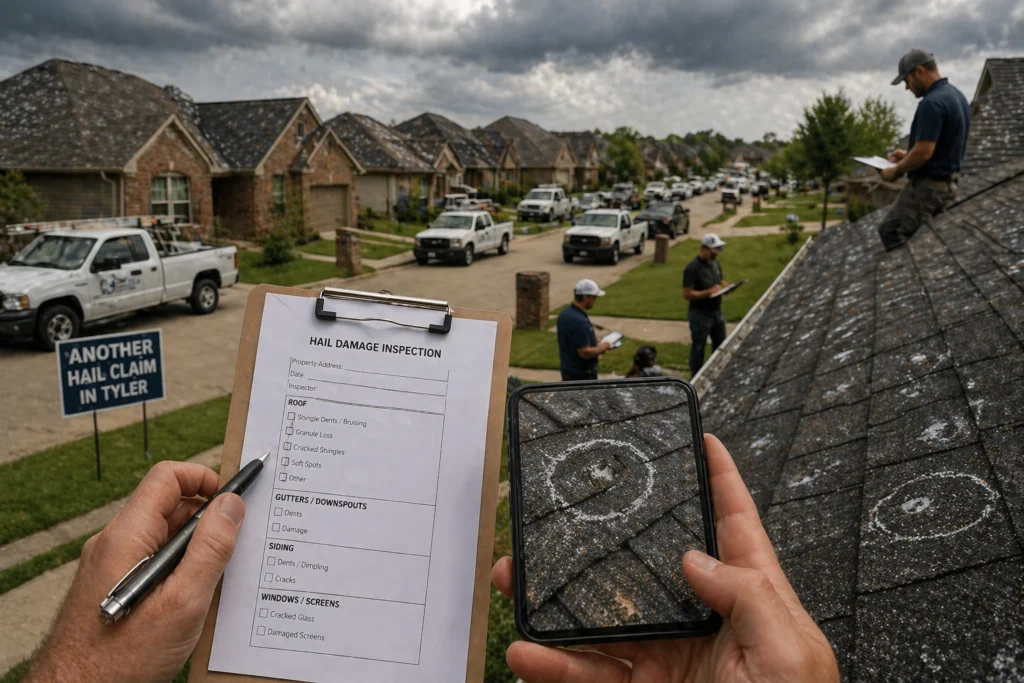
Step 5: Build a Detailed Damage Inventory
List everything:
- Roof sections
- Gutters
- Windows
- Interior damage
This becomes your claim framework.
Step 6: Record Video Walkthroughs
Walk your property and narrate what you see. Video adds clarity and consistency to your claim.
Step 7: Save All Estimates and Receipts
Keep everything. Every document supports your payout.
Storm Timeline Walkthrough: First 24–72 Hours
Timing matters more than most homeowners realize. What you do in the first few days after a hailstorm can directly impact how your claim is evaluated.
Within the first 24 hours:
- Take wide-angle and close-up photos
- Record video walkthroughs
- Write down storm details
Within 48 hours:
- Organize photos and videos into folders
- Start your damage inventory
- Schedule any necessary inspections
Within 72 hours:
- Review your documentation for gaps
- Confirm timestamps and clarity
- Prepare your file for submission
The faster you act, the stronger your claim becomes.
Contractor Inspection vs Self-Documentation (What You Need to Know)
Here’s where many homeowners make a critical mistake they rely entirely on a contractor to document everything. That’s risky. Contractors can absolutely help, especially when it comes to identifying technical damage. But their documentation should support yours not replace it.
Self-documentation advantages:
- Immediate and time-stamped
- Completely under your control
- Captures damage before anyone alters it
Contractor documentation advantages:
- Technical expertise
- Ability to identify hidden or subtle damage
- Detailed inspection reports
The best approach is to combine both. Start documenting immediately after the storm, then bring in a professional to strengthen your evidence.
How to Identify Hail Damage by Roof Type
Different materials show damage differently, and knowing what to look for helps you document more effectively.
Asphalt shingles:
- Soft, dark bruising
- Granule loss exposing underlying material
Metal roofing:
- Dents and impact marks
- Deformation along seams
Tile roofing:
- Cracks or chips
- Broken edges
Capturing these differences clearly can make or break your claim.
What Insurance Adjusters Often Miss (And Why It Matters)
Even experienced adjusters don’t catch everything. And what gets missed doesn’t get paid.
Commonly overlooked areas include:
- Flashing around chimneys
- Ridge caps
- Roof vents
- Soft metal components
- HVAC units
If you don’t document these areas yourself, there’s a good chance they won’t make it into the initial claim scope.
The Biggest Mistakes Homeowners Make When Documenting Hail Damage
Let’s keep this direct these mistakes cost real money.
- Waiting too long after the storm
- Taking blurry or poorly lit photos
- Skipping wide-angle context shots
- Making repairs before documenting damage
- Relying solely on someone else’s documentation
Avoid these, and you’re already ahead of most homeowners filing claims in Tyler.
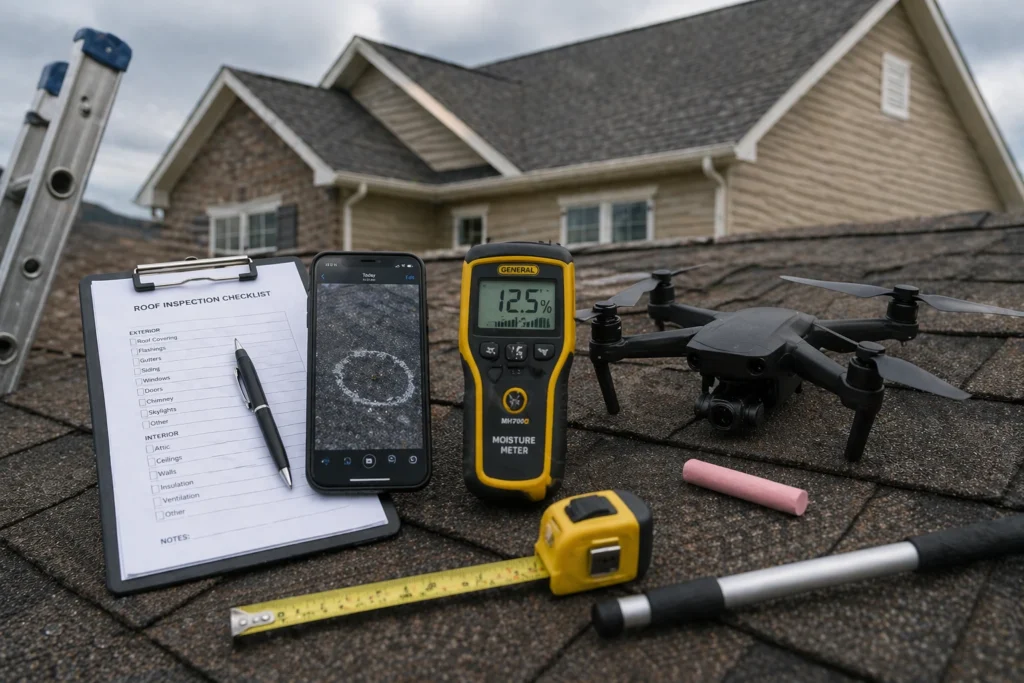
Tools That Make Documentation Easier (And More Credible)
You don’t need expensive equipment, but the right tools can improve clarity and credibility.
Essentials:
- Smartphone with a high-resolution camera
- Timestamp app or built-in metadata
- Ladder for safe access to lower areas
Optional tools:
- Drone for aerial views
- Moisture meter for detecting hidden water damage
The goal isn’t complexity it’s clarity.
How to Organize Your Documentation Like a Pro
A well-organized claim file can speed up the entire process and reduce pushback.
Structure your documentation like this:
- Photos folder (organized by area)
- Videos folder
- Documents folder (estimates, receipts)
- Timeline notes
Use clear file names like:
- Roof_NorthSlope_Damage1.jpg
- Gutter_Backyard_Dent.jpg
Organization builds credibility before anyone even reviews your claim.
When to Bring in a Professional (And Why It Changes Everything)
There’s a point where handling everything yourself becomes risky.
You should consider bringing in a professional if:
- Damage is extensive or complex
- Your claim is delayed or questioned
- You’re unsure how to classify damage
In Tyler, Texas, where hail claims are frequent, professional involvement can significantly improve outcomes especially when documentation needs to be reinforced.
Public Adjuster vs Insurance Adjuster Who Documents for You?
This is one of the most important distinctions to understand.
| Type | Works For | Goal |
| Insurance Adjuster | Insurance company | Limit payout |
| Public Adjuster | Homeowner | Maximize payout |
One is focused on protecting the insurer’s bottom line. The other is focused on protecting yours.
How Documentation Impacts Supplements and Final Payout
Initial claim estimates are often incomplete. That’s normal. What matters is whether you can support additional findings later especially in a Hail Damage Roof Insurance Claim, where missed roof components can significantly reduce your payout. A supplement allows you to request more funds for missed damage but only if your documentation backs it up.
This ties into concepts like Hilbert space, where every element exists within a structured system. Your claim should work the same way every piece of evidence connected, consistent, and clearly defined. When your documentation is strong, supplements become easier to justify.
Real-World Example: Strong vs Weak Hail Damage Claim
Let’s compare outcomes.
Strong documentation:
- Clear photos from multiple angles
- Organized timeline
- Complete damage inventory
Result: Full roof replacement approved.
Weak documentation:
- Limited photos
- Missing areas
- No structured timeline
Result: Partial repair or denial. Same storm. Different results.
Why Homeowners in Tyler Need to Be Extra Careful
Hail claims in Tyler are common and that creates a unique challenge.
High claim volume leads to:
- Increased scrutiny
- More detailed inspections
- Greater likelihood of pushback
If you’re filing in Tyler, Texas, your documentation needs to be airtight. Not good. Not decent. Airtight.
Final Thoughts: Documentation Is Your Leverage
If you’ve made it this far, you already understand something most homeowners don’t. Documentation isn’t just part of the process it is the process. Learning how to document hail damage for an insurance claim gives you control. It shifts your claim from a conversation based on opinions to one backed by facts. And that changes everything.
Call to Action
Before you file your claim, take one more look at your documentation. If something feels incomplete, fix it now not later. Because once the process begins, your leverage depends entirely on what you’ve already captured.
FAQs
You should document hail damage immediately after the storm, as long as it’s safe. Early documentation helps establish a clear and credible timeline.
Use a combination of wide-angle and close-up photos, along with video walkthroughs. Make sure to capture multiple angles and highlight damage clearly.
Hail damage on shingles often appears as bruising, soft spots, or areas with missing granules that expose the underlying material.
Yes, lightly marking damage with chalk can help make impact points easier to identify in photos without causing additional harm.
Not always, but professionals can help identify hidden or technical damage. Combining your own documentation with expert input is ideal.
Avoid delaying documentation, taking unclear photos, or making repairs before recording the damage. These mistakes can reduce your claim value.
Use timestamps on photos and videos, along with notes about the storm date and supporting weather reports to establish timing.
Yes, but it may be more difficult without pre-repair documentation. Insurers rely on original evidence to assess the damage accurately.
Documentation serves as your primary evidence and directly impacts claim approval and payout. The stronger your proof, the stronger your claim.